 I needed a great gift for my daughters’ teachers that wouldn’t break the bank but still packed a punch. I don’t shop at the Dollar Tree very often, but I couldn’t pass up the plain white coffee mugs they had during the holiday season. So I decided to personalize each one and stuff them with hot cocoa packets. This is a super easy and inexpensive project that only requires your imagination and an oil based Sharpie. Here’s the list of materials that I used.
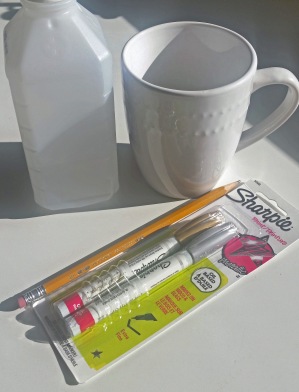
- Oil Based Sharpie in Gold
- Ceramic coffee mug
- Paper and Pencil
- Cotton Balls and Q Tips
- Rubbing Alcohol
- Oven
Step one: Use the cotton balls and alcohol to clean your mugs. The alcohol will remove any oils from your hands that my be on the surface. Plus it rids the surface of any dirt. Now you’re all set.
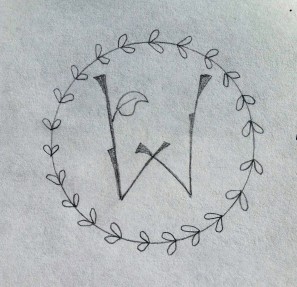
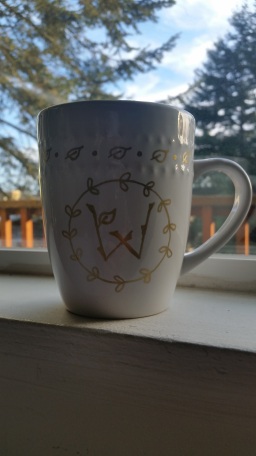
Step two: I chose a woodland themed font for my monograms. Each one was drawn by hand, but for accuracy I used a stencil for the circle. I also drew the circle on a piece of paper and cut it out with an X-Acto blade. This was extremely helpful when it came to layout placement on the mugs. I’m also a big fan of hand lettering and calligraphy. Search the internet or your local library for lettering that suits your style. Then practice, practice, practice! I drew mine freehand except for the circle, which was stenciled directly onto the cup. You can also transfer your drawing if you aren’t comfortable drawing freehand. Just flip the design over and shade over the area with your pencil. You’ll want to shade very heavy and dark. When you are finished you can then transfer the image onto your cup by tracing over your design.
Step three: Break out the Sharpie. Be sure to shake the ink well and follow the instructions on the package. This was probably the most difficult part for me. You can’t rest your hand on a flat or stable surface so that’s where the Q tips come in handy. Dip them in the alcohol and simply erase away any mistakes. I found it best to start in the center and work your way towards the outside. You’ll have less chances of your hand resting on all your hard work and smudging your design. Once you’re satisfied with your design it’s time to preheat your oven.
Step four: Heat your oven to 250°. Place your mug on a baking sheet lined with either parchment or wax paper. I found that the best way to bake the mugs, is to bake longer at a lower temperature. They were baked for 2 hours and allowed to cool for 1 hour afterwords.
Step five: Stuff your mugs with anything you like! I was going to use coffee but opted for hot cocoa instead.
There you have it. I hope that you enjoyed this tutorial. If you should have any more questions please feel free to leave it in the comment section, I’m happy to help. I also look forward to any comments or suggestions that you may have.
Did you try it? Please share. I’d love to see what wonderful ideas that you came up with!

