What a crazy week this has been! I was temporarily blinded. No joke. My little one blunted me in the eye with the end of a marker. I was out of commission for the week, eye patch and all. Now I’m almost back to normal and ready to tackle this next part of the tutorial. Without further ado, here’s the list!
- Silver seed beads X2
- Silver spacer tube
- Silver decorative beads
- 20 gague silver craft wire
- Spring from an ink pen
- Wire cutter
- Wire smoothing pliers
- Jewelry hammer (or small hammer)
- Steel bench block (or hard flat surface)
- Polymer clay (Sculpey white)
- Polymer clay sculpting tools
- Spray paint in chrome or Looking Glass Mirror Like
- Baking soda
- Aluminum Foil

Main materials used.
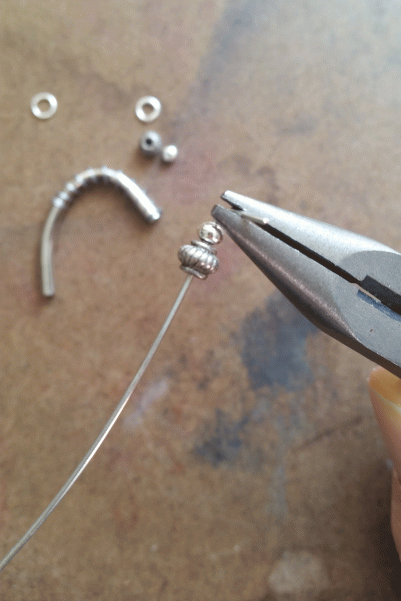
The first thing that I did was to bend the silver spacer tube to the desired angle for the faucet itself. Next you will slide the spring over the tube all the way towards the front. I wanted it to look like the fancy faucets with the detachable faucet rinser. Now take the silver wire and make two jump rings for the base of the levers. Close the rings and set aside. Now you want to make the handles for the levers. Using the smoothing pliers, straighten out the wire. Then string the larger bead first and the the smaller seed bead next. It should look like this..


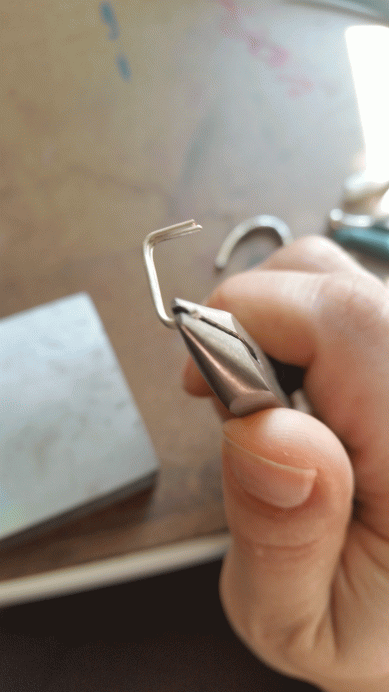
Now mark where you want the handle to bend with a felt tip pen. It’s important to bend both handles at the same time so that they are identical. I bent mine this way but for demonstrative purposes this is what it would look like if you just made one.
 Leave a good length of wire underneath for the base of the handle.
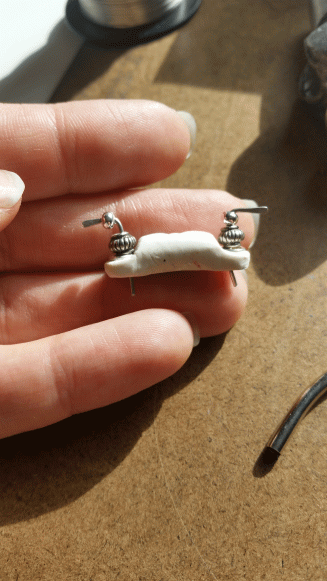
Next you’ll want to cut a small amount of clay for the base of faucet. Condition the clay by warming it with your hands. Then mold it into the shape of the base. I used a photo for reference and accuracy. Once you have your desired shape, make a depression on either side where the levers will go. Place the jump rings over the indentations and mark where the handle will go. Then add your larger decorative bead for placement. I should point out that this is a good time to make sure that your handle bases are level before you bake. At this point you should have something like this.


You can now bend the bottom of the handle. This will enable you to turn your faucet on and off. Once you are finished it’s time to hammer the handle flat using the jewelry hammer and steel bench block.
Close up of the bottom of the handle base.


Above is a before and after of the handles being flattened. The handles should be filed or sanded to round out the edges and smooth away any sharp points. You can now insert the faucet into the center of the polymer base. Press down firmly to ensure it will stand alone. Carefully insert the handles into the holes that you marked on the base with the small seed beads pushed towards the top. Your’re almost home! Add another small lump of clay to the bottom of the base, covering the bottom of the handles. Smooth the entire base with the clay tools to blend the two pieces together. Turn each handle to carve a path on the inside of the base so they can turn back and forth. This is what you should have at this point.
This photo was taken prior to me bending the bottom of the handle base. I needed to check my placement.
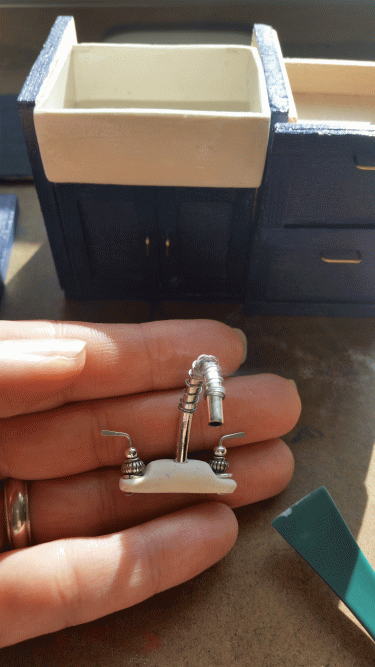
This is what your assembly should look like prior to adding the bottom base of polymer clay.
Don’t worry about any lumps that you may have in your clay. You can always sand them out later after the clay has been cured in the oven. I recommend using a light grit paper (150 or 200) to smooth the surface. Place the completed faucet in a bed of baking soda on a piece of aluminum foil. Seal the edges of the foil to protect all your hard work and bake for the appropriate amount of time. Let it cool for at least an hour. Then sand until smooth and paint with your desired spray paint color. You’re all done! Hope you enjoyed this tutorial and as always, should you have any questions please leave me a message in the comment section or E-mail me! Happy miniaturing!

